As I had mentioned in my last post, I had gone through all of my photos recently. The one harsh conclusion that came out of this undertaking was that I didn’t have a clue when it came to editing my photos for much of the past seven years.
Under the mistaken assumption that I knew what I was talking about, I made a video on the subject of post-processing a few years ago. Today I can’t even bear to watch it again, because I know it placed embarrassingly disproportionate emphasis on a small number of adjustments, utilizing very few of the available tools. Thankfully, I’ve pieced together a more coherent editing process since then, mostly through trial and error plus the occasional YouTube video. It has taken me far too long to learn so little, and I really wish I had made an effort to learn more about this subject earlier on.
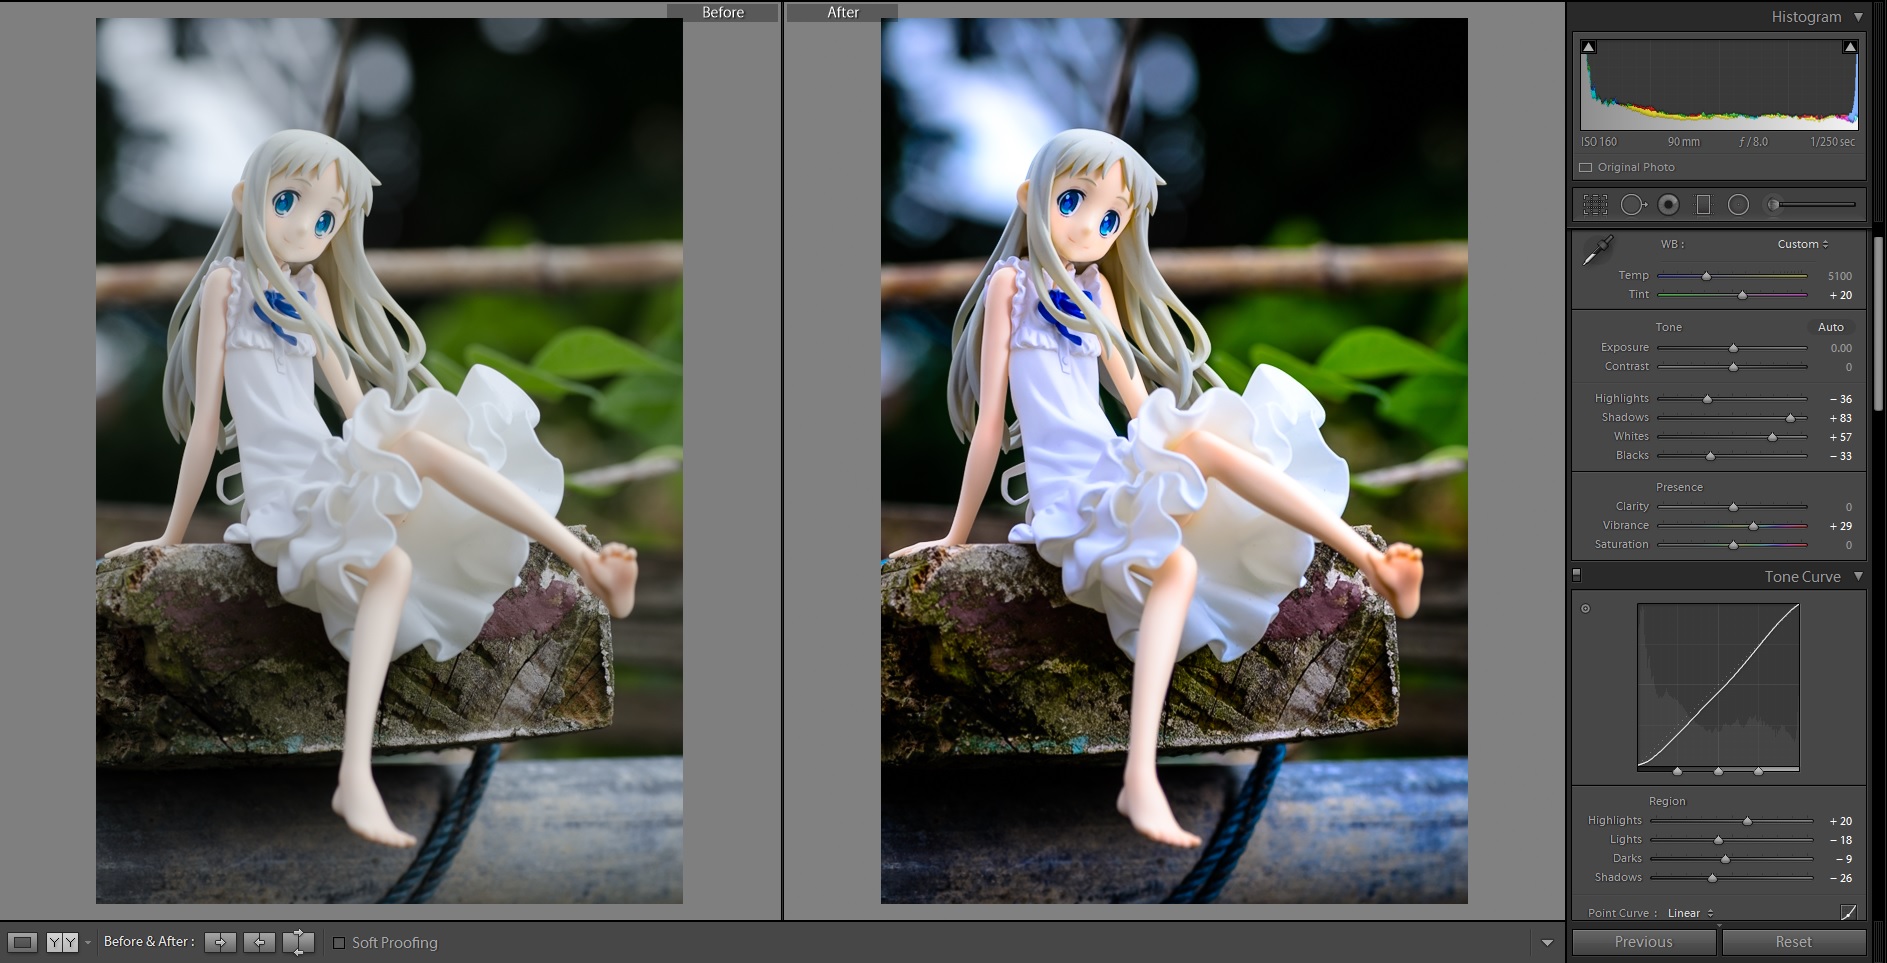
All this dreary talk brings me to the purpose of this post: just because I took ages to get a clue doesn’t mean you have to! This tutorial is meant to be a starting point for anyone looking to get into post-processing in Adobe Lightroom (or any similar photo-processing application). I will go through all of the common adjustments and then briefly explain the purpose of each. By the end of this post, you will have a better understanding of the various options available to enhance your image!